Saturday, June 30, 2012

The Dog Mansion

Some years ago, Hubby built a dog house. I can't remember now if it was built for one of our dogs who have since passed away, or if it was built for the Drooling Dog, the Wild Child's boxer, but it's the house the boxer lived in for the past few years until he (and his human owner) moved up to Humboldt about a month ago.

When the Wild Child moved, she didn't have enough room to take the dog house with her, but Hubby had big plans to disassemble it and make a trip up to Humboldt to deliver it himself--whenever he started missing the Wild Child too much and needed a little two-day excursion away from home to visit her. But as he started taking the dog house apart one day, it occurred to him that he could make the dog house much, much better. So began the building of the Dog Mansion.

I asked Hubby if I could take some photos of the Dog Mansion, and he asked whether I wanted the photos because I thought the house was that good or because I wanted to make fun of it. "Well, . . . ." I thought for a minute. "A little bit of both, I suppose."

The basic structure of the original dog house remains the same, but the interior is better braced for structural integrity. After all, they have occasional earthquakes in Humboldt.

The pet bed is old(ish)--nothing new there. But notice the fine moon door opening? That's new.


The front "porch" is old, but the Dog Mansion is sporting a new roof. Kind of like Spanish tiles, but different--probably the doggie equivalent though.

And did you notice the raised bowl holder mounted on the side of the house? I told Hubby that if it had been a TRUE mansion, it would have been a double holder, but at least the Drooling Dog doesn't have to bend far to get a drink of water.

I noticed, though, that the roof is angled to drain onto the side of the house that has the bowl. That could be a bad thing if you think about the poor Drooling Dog trying to get a drink of water in the rain and having water pour off the roof onto his head. On the other hand, he'd have fresh rainwater to drink. It's one of those bowl half full/bowl half empty problems, isn't it?


The Dog Mansion could use some new paint. When Hubby first built it, he painted it to match our house--as you can see from the outside wall of the house in the background. Frankly, I'm not sure if he did that so it would look more natural taking up a quarter of the patio space or if it was because he had a lot of that color paint leftover, but I can tell you that paint HAS shown up on quite a few projects.

For now, though, I think Hubby will hold off on the paint. Maybe he'll wait until he gets up to Humboldt and paint it there, to match the Wild Child's house. Or maybe he'll save the painting for another trip to Humboldt when he's again missing the Wild Child and the Drooling Dog.

Personally, I think it could use a window, a curtain, and some nice wallpaper. I may need to take my own trip to Humboldt one of these days.

Friday, June 29, 2012

The House Block

The other day I showed you the appliqued portion of the first Comfort & Joy block--I was almost done with it and I thought I'd be able to post the finished block last night, but I'd mixed up the day I was supposed to reveal the third block. Confused yet?

There's more. I also thought I'd be able to finish that first block last night, but I somehow became obsessed with food and the refrigerator and didn't make it into the Sweat Shop at all!

What happened was that I needed to go to the grocery store and decided Winco was the best choice. Do you ever shop at Winco? Do you get lost in there the way I do and then spend two or three times the amount of time you'd spend in any other grocery store? Yeah, I'm not sure where the savings comes in when I could probably make a lot more money just WORKING the extra hour or so I spent wandering the Winco aisles.

THEN there's all the putting away of food once I got home, because I tend to buy more "stuff" too--such good buys, I just couldn't HELP but buy 67 boxes of Rice-a-Roni, could I?

On top of all that last night, I thought I should clean out the fridge--because when I got right down to it, that was the only way I was going to be able to fit all the stuff I bought into it. And then as I cleaned and tossed, I found dried, sticky spills on each of three shelves--one was a broken egg that fell behind the egg carton and dried and the other couple spills weren't much better. Cleaning those up took another hour or so.

Probably more than you came here to find out about. I should just shut up now and show you the finished block, shouldn't I? Because I DID get into the Sweat Shop tonight.


Clearly, I still have a few unresolved food issues I need to work through.

Thursday, June 28, 2012

Ta Da!

Thank goodness I have a minder. Anne over at Cottons 'n Wool emailed the Comfort & Joy group tonight to remind us all to reveal our third Comfort & Joy block, a somewhat primitive angel. I knew we were supposed to show our block on the 28th, but since I write my blog posts late at night for the next day, I was thinking I had another day before showing the block. Anyway, enough yada, yada, yada--here's my block:


I used a few of those small pinwheels I made to replace the plain squares to the right of the angel, and I think they turned out cute!

Would you like to see some of the other blocks? Here's a list of participants who--if they were paying attention to Anne--should post a photo of their block sometime today--just click your heels together three times while saying, "I DO believe in Santa Claus," and then click on each name, and you'll be magically transported to Comfort & Joy land:

Wednesday, June 27, 2012

Comfort & Joy Applique

Now that I've finished piecing the different blocks for the Comfort & Joy quilt, I'm trying to catch up to the rest of the group. The reveal of the third block is in a couple days so I'm behind! Yikes!


Here's most of the applique and embroidery done for the first block, although there's a strip of grass with a pathway that will go at the bottom that still needs to be made and I'm thinking about embroidering a star in the upper left corner of the flag.

I'll probably have the block finished tomorrow night and I'll show you then.

It seems kind of funny to be working on a Christmas quilt when I've just finished getting my house ready for the 4th of July and summer!

Tuesday, June 26, 2012

Bustin' Out Summer

I'm not sure why, but for the last couple holidays/seasons, I've only half-heartedly decorated the house. And if you've been reading my blog for awhile, you know that's not like me, right? Since putting away the Christmas decorations, the most I've done this year is to pulled out a few seasonal quilts and call it good enough.


It may be that as I've gotten just slightly older, decorating seems to bring about a few more aches and pains. Or maybe it's the fact that instead of having all my seasonal "goodies" stored in the spare bedroom closets and cupboard, the spare bedroom has been the Wild Child's room, and the seasonal "goodies" are all stored in boxes in the garage.


But whatever the reason, I DID get a little enthusiastic about decorating for summer. I suspect the fact that the housecleaning is spread over the course of the week means I have a little more time and energy for decorating on the weekend.


And that's what I did this past weekend.


I still have a few things I want to do in the livingroom, but the kitchen, bedrooms, and bathrooms have touches of red, white, and blue in them.


Summer's definitely in the house!

Monday, June 25, 2012

Star Gazing

Continuing on with the Comfort and Joy quilt piecing, this weekend I made six star blocks (in two sizes--6-1/2" and 8-1/2").


The camera caught just a little sneak peak of this month's applique block for the quilt--can you see it there at the top right of the photo? It's also upside down, so it probably doesn't look like much, and I can't reveal it for a few more days. That's fine with me though--I'm just getting started on it!

Beside making stars, I completed a square in square block and quite a few flying geese--I think there are over 30 of those.


Because the geese are totally scrappy, I didn't use any of the no-waste, quick methods, but I DID save the corners I cut off, and I sewed them all together into little pinwheel blocks. The quilt uses a number of plain strips, and I think I'll replace some of those with the pinwheels, for a little added interest.

This means I'm done with all of the block piecing--now I "just" have to make all the applique blocks--AND I have to catch up on blocks one and two, since we're making block three this month.

I love this quilt! I'm glad Anne twisted my arm and forced me to join in. Who else is working on it? Want to play along with us?

Sunday, June 24, 2012

Parlez vous francais?


On Saturday morning, my friend Lisa called to find out if Hubby and I were free for dinner. Yep, we sure were! Wanting to try something new, I did a little browsing through Yelp and found a couple possibilities. Eventually I decided we would try a French restaurant called La Provence that had some really good reviews and an interesting menu offering farm to table, seasonal selections.

One thing quilting has done for me is to make me a little more knowledgeable about food, because I often have the Food Network or the Cooking Channel on as "background music" while I'm sewing. When I DO cook--which is mostly on weekends--I've become a bit more experimental with food than I used to be. And without really thinking much about it, I've also picked up a some food terminology too--like "farm to table."

Hubby and I arrived at the restaurant a little bit earlier than our friends, and we decided we asked to be seated at our table to wait. While waiting, Hubby browsed the menu and was dismayed to find he understood very little of it. All of the menu items were in French, although the English translations were provided. Still, some of the English terms were unknown to him, like "charcuterie."

I think I was probably first introduced to the term "charcuterie" by the show Unique Eats. I've heard it used often enough to know it has something to do with preserved meats that are usually transformed in some manner--made into sausage or salami, for instance. On the menu of La Provence, one of the small plates was "charcuterie" and the description included "saucisson, sausage, and terrine." Of all of those words, the only familiar one to Hubby was "sausage." I wasn't familiar with "saucisson," although I've since learned it's similar to salami or summer sausage. I knew what terrine was, but I had a hard time explaining it to Hubby. I told him it was usually a meat mixture, like pate, that was pressed into a mold, like a brick, and then turned out and sliced. Doesn't sound very appetizing, does it?! And I surely can't blame Hubby for wondering what I'd gotten him into and giving me that look that lets me know he thinks I'm probably nuts.

In the end, Hubby had French onion soup and salmon for dinner; I had a cheesy spinach/artichoke dip with flat bread as an appetizer that I shared with the others, and Chateaubriand steak as a main dish. No one had the charcuterie plate, darn it! I wish we had--I'd love to be a little more adventurous and try new things.

All in all, it was an excellent dining experience, and I'd like to go back again. Maybe next time we'll try the charcuterie. Have you tried anything unusual while dining out lately?

Saturday, June 23, 2012

Almost Like . . .

Remember how it felt to walk out of school when the final bell rang on the last day of the school year? I kind of felt like that today.

Friday night; the start of the weekend. When I passed through the office doors at 7:30 p.m., it was still light out, of course, and the temperature was in the mid-70s. Beautiful.

Not only was it the beginning of the weekend, but it was the last day of working for two attorneys and putting in tons of overtime. How excellent is THAT?!

I enjoy both of the attorneys I've been working for, so it's a little bittersweet to be "losing" one--kind of like when you walked out of school on that last day of the school year and knew nothing would ever be quite the same again. But it's good too. There's a feeling of relief and freedom.

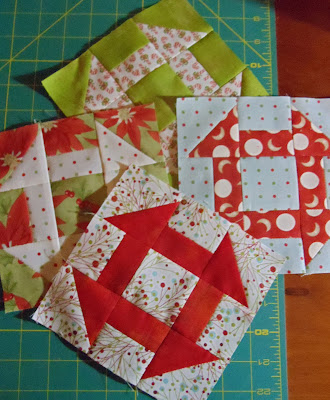
I came home and went to the Sweat Shop to unwind. Tonight I made four churn dash blocks for the Comfort & Joy quilt.


I also made a pizza for our dinner--some of the finest comfort food on the planet!

At 11 p.m., it's still a little early for bed for me, but a cool bath, some soft jammies, and a good book should cap off the day quite nicely. Summer days and summer evenings are here. Time to relax and enjoy them.

Friday, June 22, 2012

The Best Way . . .

I think the best way to forget about a headache is to do something you enjoy. I've had a sinus or pressure headache all day, but once I came home from work and got busy "playing" in the Sweat Shop, I forgot all about it.

Tonight I finished cutting and piecing the 11 9-patch blocks for the Comfort & Joy quilt as well as 38 half square triangles.


They say laughter is the best medicine, and I can agree with that, but I think sewing ranks right up there too--just as long as it doesn't involve too much math!

Thursday, June 21, 2012

Twist My Arm--I Love It!

You all know Anne over at the Cottons 'n Wool blog, right? The half of me that loves all things darker, homey, and primitive loves everything she does. I drooled a bit over the homespun Country Homecoming quilt she started working on a couple months back. She invited other quilters to join in, and the other half of me--the half that likes happy, brighter quilts--thought the quilt would be fun to make with happy, brighter fabrics. As I found out, though, maybe not. I made three house blocks and they weren't calling to me the way Anne's blocks--and the blocks of other quilters working on this project--did, so I put them aside. I'd like to start over with homespun fabrics, but I haven't gotten there yet.

Anne also started another block of the month project, a Christmas quilt called Comfort and Joy. I'd come across the pattern and admired it just before I saw it on her blog, so I purchased it and told Anne that I'd think about joining in. She urged me on and before I knew it, I was included in her group of quilters, despite the fact that I hadn't even cracked the seal on the bag the pattern arrived in!

Today I received a group email from her about posting our third section of the quilt. Yes, our THIRD SECTION--and my pattern hadn't even been opened. Time--PAST time--I knew to make a decision and either start on the quilt or gracefully bow out of the group.

Well, I suspect you already know what I decided.


This evening I rummaged through my Christmas stash and pulled out some fabrics that appealed to me, and you can see them stacked there behind the pattern. One of the fun things about this pattern is that the back shows the same quilt done in country homespun/primitive fabrics, but I think my color choices are a little more consistent with the quilt on the front.

There are a lot of pieced elements that pair with the appliqued blocks, and I like that. Ideally I'd like to get all of the pieced elements made ahead of time and then work on the applique month by month. Tonight I pieced the three log cabin blocks I'll need for the quilt.


I started the 9-patch blocks too, but I only made three so far--I think I need to make eight more.


I don't know if I'll have section 3 done in time for the "reveal"--in fact, I can't remember off hand when we're supposed to post that--but at least I've begun.

Wednesday, June 20, 2012

Another Block Done!

Here's the Harrington & Hannah block for June--I finished it this evening. These blocks really go pretty quickly. Last night I cut the background and picked out and cut the wool shapes, and so that just left the blanket stitching and embroidery for this evening.


I was wondering what Michelle May was going to design for June--most of her designs for this block of the month have been representative of each of the months in some way, but the pineapple doesn't quite fit the pattern exactly, and I appreciate that. After all, I'm also doing the Country Cottages BOM and the blocks for that one are designed to depict each month; I wouldn't want to be doing the same thing for both.

The pineapple is a symbol for welcome that's found in many colonial designs, and I like the folk arty appeal as well as the sentiment. I wonder what she'll come up with for July? We'll have to wait a few weeks to find out.

Tuesday, June 19, 2012

Lovely Little Fatties!

Remember the new Bunny Hill pattern I was drooling over a couple weeks ago? Pumpkinville? Let me refresh your memory:


I didn't sign up for a block of the month program because I want to make mine with darker fabrics--fall and winter quilts just feel "right" to me in darker shades. The problem was, though, that my stash was a bit lacking when it comes to oranges and rusts.

Last weekend, I needed to run a couple errands to Trader Joe's and the quilt shop that's in the same shopping center (they had taken down their Schnibbles display, so I needed to pick up some quilts I'd loaned them). I had one of those "customer appreciation" reward cards burning a hole in my wallet for a few months, so I thought I'd use it for some orange fat quarters. Nice, eh?


Not bad for a start, but it gets better! Last week, I got an email from Renee Nanneman/Need'l Love about some new fat quarter bundles for fall. Was she reading my mind or something? It almost seems that way! So I quickly placed my order and look what was waiting for me when I arrived home from work tonight:


Now I can hardly wait to put the rest of the fabrics together and get started!

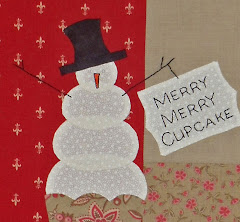
I hate to change the fall atmosphere on you, but I've got to tell you I finished this month's Merry, Merry Snowmen block--yes, "got to" tell you!


Why "got to"? I was getting a little worried about having too many block of the month projects going on, but I'm pretty pleased with myself right now because I think this is the earliest I've finished a Merry, Merry Snowmen block since we started. I've also finished this month's Autumn House and Country Cottages and I'm working on Harrington and Hannah now.

I guess I just want to be sure that if I start another project, I'll have time to fit it in and not become overwhelmed. But I wonder if I have time to fit three or four more projects in? Because that's how many I want to start in the next couple months. Yikes! At least Autumn House and Merry, Merry will be finishing in a few months. "Sew" many exciting projects, and "sew" little time!

Monday, June 18, 2012

Time Flies . . .

Can it really have been two days ago that I sat here contemplating the freedom of the weekend ahead? Now the weekend is over and I have five days of work before the next weekend arrives. And you know what? I bet those days will go a lot slower than weekend days do.

Last week when I was working so many hours, I got off track with my daily cleaning schedule. After all, who wants to come home at 10 p.m. and clean for a half hour or so? Not me!

The schedule I've been using doesn't schedule any cleaning on Sundays, so I used today to catch up a bit. I should have done some of it yesterday, but I was too caught up cooking, I guess. I thought today that if I went back and started with Thursday's chores and worked my way through Saturday's, I'd be half way done, and by the time Wednesday arrives this week, I'll be back to having a spotless house. It should work, I think.

I really enjoyed reading your comments about some of your favorite things. An overwhelming majority of you said you enjoy spending time with family. Today, Father's Day, was a good day for that, although it was kind of quiet here. The Wild Child has moved up to Humboldt in preparation for starting school in the fall, and Soccer Son was away coaching a tournament in Reno--although he'll stop here on the way home, because we've been puppy sitting Izzy, the Drooling Dog's daughter, and he'll want to take her home.

I randomly picked a winner of the Bareroots Seasons Stichery pattern. The winner is Sally A., who said a couple of her favorite things are coffee and a visit with a friend, or sitting having coffee on the deck and planning her day. Someone whose favorite things involve coffee--well, I'd surely enjoy joining Sally on her deck for some!

Sally, email me your mailing address and I'll put the pattern in the mail to you this week.

I'm glad you could stop by to visit. Would you like to come out to my patio and have a cup of coffee?

Sunday, June 17, 2012

Love/Hate Relationship

Food. Or more specifically, cooking. I love it and I hate it.

On weekdays Hubby cooks, so weekend cooking is up to me. Sometimes, like this weekend, I'll decide to do only minimal cooking--throw something simple on the grill for dinner and spend the maximum amount of time in the Sweat Shop that I possibly can.

Then I'll start getting crazy ideas. Why don't I just whip up a quick mac 'n cheese for lunch? And veggie sticks for a snack? After all, we have to eat, right? And it really won't take that long. Elbow macaroni practically cooks itself, and it only takes a few minutes to make a white sauce. With melted cheese. After that, the mixture can be poured into a dish and slid into the oven and left for awhile until it turns into a quagmire of bubbly goodness with a cheesy brown crust on top. And the fresh veggies--red bellpepper and carrots--they taste so good and are healthy too. Slicing and peeling shouldn't take too long, should it?

An hour later, I'm back in the Sweat Shop, well fed and happy. That wasn't so bad, really. I remind myself I really SHOULD get up and move around a bit anyway. Now I can get down to it.

But soon I have to stop and run a few errands. A couple hours later finds me back in the Sweat Shop--finally. Now for some quality applique time, just me and Merry Merry Snowmen.

Again the crazy ideas come. Wouldn't grilled shrimp marinaded in garlic and a pineapple juice reduction be delicious? Served over a bed of chicken stock-cooked rice and sliced green onions, yum! And coconut goes with pineapple, right? Maybe I could toast a little coconut to sprinkle over. With just a little chopped parsley and chopped basil.

Two hours later, I finally make it back into the Sweat Shop.

As I stitch, another crazy though sneaks up on me. It's almost Father's Day and Hubby loves cream puffs. Surely it would be fairly quick to make instant chocolate pudding. And then the cream puffs. And then the homemade whipped cream to go on top.

Another couple hours and I'm back at applique when a final crazy thought knocks on the door. Wouldn't this be a good time to take a nice, relaxing bath and get ready for bed? A full stomach has made me sleepy and lazy. Applique will have to wait until tomorrow. And tomorrow I'll guard against crazy thoughts and have a more productive day. Then again, it IS Father's Day, and I really should cook a few of Hubby's favorites, shouldn't I?

Saturday, June 16, 2012

A Few of My Favorite Things

Friday night is one of my favorite things. The work week's done and two days of doing whatever I feel like doing stretch ahead.

This past week has been particularly tiring. Taking last Friday off work to attend my nephew's wedding meant coming into work Monday morning and wading through all the paperwork and emails that had accumulated in my absence. It was 2 p.m. before I made it through what had been left. Monday was a 12-hour work day. Tuesday was about the same. Wednesday was a little better, and Thursday, during my annual review, management acknowledged that perhaps these two attorneys I've been working for are a bit too much for one person, so relief is in sight.

Sadly, these two attorneys I've been working for are a couple of my favorite things too, so I'll be sorry to lose one of them. It can't be helped though.

On top of the work--or maybe because of it--I was hit with a bit of a stomach flu with body aches. It didn't knock me out but it was just enough to make everything a little more difficult. Remember the other night when I blogged I needed a recess? That was part of it.

With work being what it was, I didn't have very much "play time" this week, but I made good use of what I had and finished the Autumn House block for the month. I think this applique project is one of my favorite things too.


By Friday, I was feeling a lot better, all the way around. My health was normal again and work was a little less stressful. In fact, I went into work a little late and had lunch with my friends too. At Chevy's. Chips and salsa heaven. And a little something to wash the chips down.


I'm sure I deserved it. I just wish we could have stayed for a second round, because I'm sure I deserved that too!

Friday is a day to celebrate. Another of my favorite things is having a little giveaway, so I looked through my patterns and found one just for you. It's a Bareroots Little Stitchies pattern called Seasons Stitchery.


I like it so much, I've bought it twice; I just didn't know when I bought it again that the second one was for you.

If you'd like to win this little pattern, tell me one of your favorite things. I'll draw a winner on Sunday night and announce it on Monday's blog post. And remember: You have to come back here on Monday to see if you won and claim your prize. Good luck!

Friday, June 15, 2012

No, That's Not What I Meant!

Several of you among my ten frequent readers asked that I continue to talk about applique methods and tips, so I will do that as things occur to me. I'll probably intersperse it with non-applique blog posts so the remaining four of you who don't want to hear about applique will have something to read on occasion.

I wanted to follow up the last couple posts by giving you some alternatives. I searched Yahoo Images for "applique stiletto," and look what popped up!


Pretty, aren't they? There was a time when I used to wear stiletto heels but the older I get, the shorter my heels get. The really sad thing is that I keep thinking if I was just TALL enough, I'd look much thinner. Good thing the British and horse racing just might manage to make hats fashionable again. A nice hat could add a foot to my height.

Anyway, there's another kind of stiletto that can be used for applique--they're pointy long things like this one:


Stiletto's can be used instead of the Trolley Needle I showed you. And if you don't want to invest any money in an extra notion, you may have something else hanging around you can use instead, like a long seam ripper or even a narrow screw driver. I prefer the Trolley, though, because wearing the stiletto on a finger frees up the rest of my hand to help hold the applique piece and manipulate the fabric and iron. Still, I want you to know that you don't need to go out and buy everything all at once.

You can even go waaaaay low tech/low gadget and start the way I did--with just the freezer paper and a needle and thread to baste with.

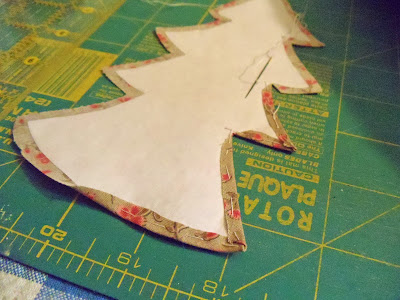
First, though, I thought I'd show you what I mean about putting the points and valleys of the applique template on the bias. I'll illustrate this idea using a pine tree shape. In this first photo, I've placed the freezer paper shiny side down on the wrong side of the fabric, on the bias. In other words, I've placed the template from corner to corner on the fabric instead of straight up and down. That will keep the fabric from fraying quite as much.


In the next photos, I finger press the fabric to the back of the freezer paper and baste in place, taking stitches that are between 1/8" and 1/4" long and turning as I go.


With this method, I feel I have a little more control of the points and valleys, although that might just be because I don't have as much experience with the starch method yet.


Just before I reach the tips of the tree, I fold the seams over on each other as you would when wrapping a gift. I baste the folded corners into place.


In the valleys, I make one clip just up to the paper and fold back on each side. With my basting stitches, I make sure to "pin" back the seams on either side as close to the valley as possible.


When I'm done, I press the "good" side and the under side with an iron. See how nice the edges look? When I used to use this method, I'd then pin the applique piece, with the paper still underneath, to the background and applique stitch around the shape. Once I'd sewn around the perimeter, I would cut away the background fabric behind the applique piece and pull out the freezer paper. Now that I've learned the starch and glue method, I might be inclined to starch the basted applique and iron it dry, then pull out the paper and proceed with glueing the applique to the background as I demonstrated yesterday.

With applique, there's no right or wrong method--whatever works for you is the method you should use. That might be raw edge, it might be machine, or it might be hand applique--or a combination. Try them all a couple times and see what you enjoy. Chances are you might find you enjoy applique after all.

Needle on, Garth!

Thursday, June 14, 2012

Stick With It . . .

Here we are, after a little break to stretch our fingers, back to the applique tutorial. At this point, all of our pieces are prepared--the fabric is ironed onto the freezer paper and the raw fabric edges have been ironed under and are stiffened with starch. Time to talk a little bit about the other important part of the applique block: the background.

Some designers like to keep their backgrounds simple and some designers like to design pieced backgrounds. For instance, Anne Sutton of Bunny Hill often designs pieced backgrounds, while the Shabby Fabrics/Country Cottages blocks I've shown you are all of one piece.

For backgrounds that are all of one piece, I like to cut them a little larger than the pattern specifies and trim them to size after I've added the applique. Why? Because the process of stitching the applique to the background, often in layers, tends to shrink and slightly distort the background fabric a bit, so by cutting it larger than needed, I have an opportunity at the end to trim the block to the right size.

With pieced backgrounds, there aren't any good options--we simply need to piece the background as directed by the designer. On the positive side, pieced backgrounds often lend more interest to the finished quilt. On the negative side, after it's appliqued, the block may not be exactly the correct size, so we need to take a little extra care in adding the applique to ensure the background isn't distorted.

Another question we must consider is whether to trace the applique design onto the background. Designers usually include a layout page showing where each piece belongs on the background, and using a light box, the layout can be traced onto the background. Alternatively, we can simply eyeball the position of the pieces when we "audition" the layout on the background. Normally I make the second choice and lay out the applique pieces where it looks like they go. Why? Because it often seems that when I trace the pattern onto the background, the pieces don't line up just perfectly and my choices to correct the problem are somewhat limited. I have, in the past, ended up completely re-doing applique pieces so they will fit better, and that feels like wasted time to me!

Now that we have backgrounds figured out, let's get back to the next part--the glue part. Here's what I use--a water soluble applique glue and wooden toothpicks to apply the glue. That's it.


Using the water soluble glue means that I can wash the glue out if I make a mistake. It should also wash out of the finished product later. I like that.

Before I start, I like to lay out all the applique pieces in the position they'll go in--just like I laid out the freezer paper pieces before. Once I've made sure I have all the pieces, they all fit together, and the fabrics are correct, I'm ready to begin. First, we need to remove the freezer paper. I do that piece by piece, just as I'm ready to use it.


The starch should hold the edges under, but they can be touched up with the iron before gluing if the seams aren't flat.


Next, lay a few pieces in place--and remember to check back to the pattern to see if the pieces are numbered because you'll want to start by positioning piece number 1, followed by piece number 2, then piece number 3, etc.


When you know where the piece will go, apply a slight bit of glue along the seam allowance. Don't apply the glue too close to the folded edge, though, because you'll need to applique the edge, and pushing a needle through dried glue isn't easy. And be sparing with the glue--you just need enough to hold the pieces into place for sewing--think about how pins will secure something without pinning every little bit, right?


You might want to glue a couple pieces in place and then applique those pieces before moving on. Or you might want to glue ALL the pieces in place before sewing them down. Much of the time, I glue first and then sew. Here's a photo of an Autumn House block with all the pieces glued into place and ready for stitching:


And that pretty much concludes all of the prep work for the freezer paper and starch method of applique. Would you like me to do a post or two about hand applique, techniques, and tips? I'm not an expert, but I've taken some classes and might know a thing or two I can share. Let me know if you'd like to hear more.

Wednesday, June 13, 2012

Recess

Remember recess? When you were a kid, it was the time between lessons when you got to go out and play. Well, this is your opportunity to enjoy recess between applique lessons.

For various reasons, all of which sound a bit whiny, I'm not really feeling like writing a tutorial tonight--too much concentration and time required.

So let's all meet back here in 24 hours, and I'll see if I can do a better job then. Spit wads will not be tolerated.

Now go out and play.

Tuesday, June 12, 2012

Keep Going . . .

Continuing on with the applique tutorial . . . . Note that some of the photos are of Imelda demonstrating while I snap the pictures and some are of me demonstrating while the Wild Child does the honors.

Once the freezer paper templates have been traced and cut, you'll need to iron them onto the back of the fabric you want to use. In order to try to minimize frayed threads, I try to position the templates so the "valleys" (the inward points) and curves are on the bias of the fabric as much as possible because the bias edges fray less and stretch more.


In the above photo, Imelda is using her iron--this is one she uses for applique. In a minute, I'll show you the supplies you'll need, and you'll see my iron, which is a little different. Either style is fine.

For this first step, you can use a regular iron. On a regular cotton setting, iron the shiny side of the freezer paper template to the wrong side of the fabric--it magically sticks! Freezer paper templates can be used over and over several times.


Next, trim the fabric, leaving about a 1/8" to 1/4" seam allowance--this is the "extra" fabric that extends past the freezer paper template.


Now for the specialized supplies you'll need for starching and turning the fabric:


Most important, maybe, is a pressing surface. My friends and I like these little portable "book-style" combination pressing surface and cutting mats. Sure, you can use a regular ironing board, but these take up only a little space and can be used anywhere. And there's my iron--long and thin and different appearing than the one Imelda used in the photo above. And that pointy metal thing in the plastic container just under the iron? That's pretty important too! It's called a Trolley Needle, and you can see Imelda wearing one in the photo where she's demonstrating her iron. It's a handy tool that allows us to turn fabric and work with the iron without burning ourselves. Finally, you'll need starch--either spray starch or a liquid pressing starch, but not a concentrate--just the strength you'd spray on clothing. The starch is kept in a small, airtight container. I like to apply the starch with a paintbrush, but Imelda has this handy "pen" applicator--


It's called a fabric folding pen. Why? I'm not sure. And it's made for something else, but it will hold liquid starch and the tip applies it evenly.


Back to the applique. You'll want to clip into the "valleys" and inside curves. Some people like to clip the outside curves--the ones that will pleat or overlap a bit. I don't bother with that but it's a personal preference.

Here's Imelda trimming her pumpkin piece as I've described above.


Next she uses the starch pen to apply starch to the seam allowance close to the edge of the freezer paper template, but trying not to get the paper too wet, and working only a couple inches at a time. It's easiest to fold and press fabric that's damp from the starch, but if it dries, it will still work, or you can apply a little more starch.


Now, using the iron and the trolley, she manipulates the damp fabric over the edge of the freezer paper template and irons the seam allowance into place as she goes. Because the fabric is starched, it will stay in place.


(I told Imelda we'd have to do the photos over because her rather large diamond reflected the flash and whited out the shots. She believed me for a second.)

The first few times you try to fold over the fabric and iron at the same time, it will seem very awkward, especially wearing a long stiletto on your finger. But you'll "get" the technique fairly quickly. Another thing to watch for: Because the freezer paper gets damp too, sometimes it will fold with the fabric. If you find this has happened, just press the fabric back out, press the fold out of the paper, and begin folding and ironing again.


And here's Imelda's pumpkin! Want to see what happens next? Come back tomorrow!

Oh, and one final word of warning: When you're wearing a Trolley Needle, try not to forget you have it on and rub your eyes. NOT a good thing!